
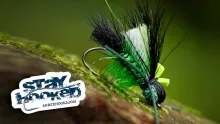
Before you know it, the summer is upon us, and a hopper pattern can suddenly be what makes a day. Tom Biesot's hopper is a good bet. Using a foam body and a couple of neat tecniques

Last year I was so lucky as to be able to fish the Eifel region In Germany twice at our favourite hotspots, together with my wife.
It was the first time
we went there in May; we usually go there in the month of September.
I was quite surprised to see how exuberantly the larger insects such as bugs, flies and large mayflies behaved. Compared to our September trips the trout were much more willing to get the bigger flies. They even made high jumps in the pursuit of these insects.
Just for the sake
of trying something new I tied a rather big foam grasshopper, which I had come upon one winter evening, to the end of my leader at the same time realizing that May is not really the month for grasshoppers. August and September are the months. To my surprise, however, the trout hunted for them quite well. I even caught my biggest Eifel brown trout so far with the grasshopper.
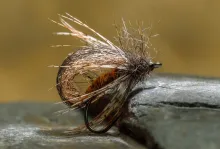
It is a nice imitation of a grasshopper quite well capable of surprising you.
The basis for this pattern is a foam bug body that is used to make beetles and spider patterns , it is a good body for making hoppers too! I have a large collection of bodies in several sizes from Rainy's in four colours. But it is hard to get these bodies nowadays.


I found another supplier on the internet and that is Wapsi, but they only have two colours, black and white. You can also make your own body from 4 mm thick closed cell foam.
Cut it with a pair of scissors to form it like the original shape. You can also glue two different colours together. Yellow underside and green on top is a good choice, or yellow and brown.
Tying instructions
The instructions for tying this grasshopper are as follows:
Step 1
divide a bug body into 4 equal parts), as in the picture

Step 2
Place the hook in the vice and start tying the thread. Begin about 3 millimetres from the eye until you reach the hook bend and put some glue on the hook shank.

Step 3
Place the bug body on top of the hook and position it in such a way that the narrower part ends at the eye of the hook see the picture.

Step 4
Tie up the bug body with the thread (first segment) and check for possible displacement of the body, squeeze the sides when you pull the thread.

Step 5
Pull up the bugbody and turn the thread to the markerpoint and tie the second segment and tie in a hopper leg from pre-knotted pheasant tail fibres using two turns which should not be too tight.

Step 6
Now tie in the hopper leg on the other side using two turns again. Proceed by positioning both legs as in the picture which must not be tied too firmly, otherwise they will spread to much. Put some glue on the legs to fix them. Do not cut off the leftovers. They will be used to form the front legs.

Step 7
Keep the tying thread under the body and bring it forward for shaping the third segment. After that the leftover fibres of the hind legs must be placed in a forward position and tied between the third and fourth body segment at the markerpoint . Also some glue should be applied between body and hook shaft.

Step 8
Cut the forelegs to size and thin them out resulting in two small legs on both sides, but that is not necessary.

Step 9
The topside of the body and the underside of the head will be coloured green or brown with a waterproof marker pen, the under-body will be kept light.

Step 10
For fixing the eyes in their position we will be using a needle and two prefab eyes.
Stick the needle through the head as shown in the accompanying picture, keep the eyes placed high and let the needle point slightly pointed upward.

Step 11 + 12
Now stick the stalk of the eye into the eye of the needle and pull it through the head.


Step 13
Perform the same action on the other side.

Step 14
Cut down the antennas to a length of approximately 15 millimetres.

Step 15
Push the eyes back a little with the help of the stalk and apply la little glue to the stalk between the eye and the body and then pull it back against the body to fix them.
Step 16
Take a short length (25 mm)of Antron thread in the colour white, brown or another wing colour. I prefer to use white which makes it possible to colour the wings with a marker pen.Tie the Antron in behind the head segment. Don't make the wing too thick. Keep them light and airy. After that lock up the thread and cut very short between the segments

Step 17
To make sure that the wing goes down and stays down we will use a special tool: a paperclip folded inside out (see picture).

We hang the paperclip, with the small bend pointing up, across the body and wing and see to it that every fibre sticks out at the back. After that a small amount of 5-minute epoxy is mixed with a very small amount of EZ shape sparkle body either green or brown. We could also use UV curable resin to mix with the EZ shape, which must be kept a little transparent or else the hardening process with the UV lamp will not work.

Step 18
The epoxy is applied at the back of the head and across the part where the wing has been tied in, at the same time making a sort of wing cover. Take care that the resin runs through the wing and keep it in place (see picture). It works best when we use a dubbing needle. Let it dry or cure with UV light.

Step 19
After the curing of the wing cover is finished we will have to cut the wing to its proper size, keep it a little longer than the body length giving the back of the wing a rounded shape.

Step 20
We can put some colour on the wing with a green or brown marker pen. If it is deemed necessary the wing could be thinned out a little more. The wing cover could also be coloured either with a pen or some nail polish. When we look at our hopper , we see a good likeness compared to a genuine one who stood model for my hopper.


Step 21
Now all that is left for us to do is to apply a dark brown or black colour to the antennae which is the finishing touch to our grasshopper.
When we look at our grasshopper from under just like a trout or other fish will see our grasshopper we will observe a good likeness of silhouette and that is what really matters.

We will also notice
the square-shaped head. The fact that the grasshopper really looks like a grasshopper when viewed from above is a nice bonus for the fly tier but I think our trout don't care for thater .

Please trout!, don't eat me!!
I will recommend
applying a little grease onto the grasshopper's wing and legs. Improved flotation will give a better balance and make it float straight on the surface.
The best places to fish a hopper pattern is on a stream with some open grass land on one or both sides. Fish it as close to the shore and vegetation as you dare and prepare for a big splash! My leader points for this pattern are at least 0,16 mm .
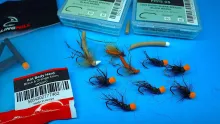
Here are a couple of hoppers and other insects made from foam bug-bodies.


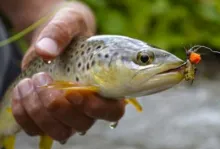
This 41 centimetre German-Eifel trout mistook Tom's Hopper for a real grasshopper.

Have a go
at it yourself and keep me informed!!!
- Log in to post comments


Great job on develop
Great job on developing the hopper & presentation! Will be tying some up for the Summer.
Hello duke,
Thank
Hello duke,
Thanks for the nice comment on the pattern, you said I have added your pattern to my book!. Have you written a book?. I am interested what kind of book you have written? Please let me know. And I think it is great to tie flies with your grandson and to fish with him.
Best regards,
Tom .
I have added your il
I have added your illustration to my book. Very nice hopper. My grandson and I ty flies. I do terresterals but it is so intense that my eight tear old grandson has trouble with some of the technics. I am trying not to let his interest stop. When I show him a regular fly he calls it old school. We are getting ready to go to ty fest in Feburary, any advice. I have talked to some of the big names that I respest.
Amazing pattern and
Amazing pattern and looks easy enough to tie. Will be trying a few of these on my homewaters here in CO. Thanks for sharing.
Thank you all for th
Thank you all for the nice comments on my hopper-pattern.
Tom Biesot.
That's a very nice l
That's a very nice looking fly! More understated than many foam hopper patterns. Thanks.
What a great pattern
What a great pattern.
Thank you!
Great pattern.
Tha
Great pattern.
Thank you!
very nice hopper Tom
very nice hopper Tom !