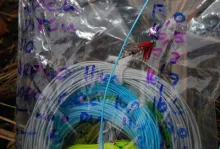
Les Austin shows you how to construct a simple balance to weigh you fly lines. Using a ruler, a few paperclips and some nuts you can make a precise balance, which can help you determine the AFTM class of all of those fly lines you may have laying around.
I cannot claim this as an original idea. I first read about it in a North American Fly-fishing magazine a good while back. Which magazine, and who was the author I cannot remember, and the magazine was given away years ago. Who-ever had the original idea, it seemed like a good scheme to me and cheap to make, so I thought I would try to make one from memory.
The system uses a “beam” to balance the item to be weighed against a known weight. When the weights at each end are equal the beam is level. The human eye is very good at accurately assessing whether things are level or if two edges are parallel, and this system is accurate enough by eye for 'fly-line purposes'.
First find a weighing beam
It is important that the beam can be trusted to be a consistent weight-per-inch (or centimetre) all along its length. In other words, that it is the same thickness and density all the way along. A piece of wood from your scrap pile would probably not be suitable. But an ordinary plastic school ruler will do just fine. Not only that, but it is already marked out for you. What you need to do is accurately drill three holes in it. My ruler had inch marks on one edge and metric marks on the other, so this description uses mixed units, as follows;
A little way in from one edge, drill one small hole through the centre-mark. On a 1 foot rule that's right on the six-inch mark, on a 30cm rule, drill the 15cm mark. Be sure you are far enough in from the edge that the drill doesn't run out through the edge of the ruler.
Now turn to the other edge, and near the ends of the ruler, drill two more holes, one at each end. You must drill the holes the same distance from the centre – on my rule I drilled 5mm in from the first and last marks of the 30 cm scale.
To make the beam swing more freely, it helps to ease the centre hole a little by hand with a countersink bit or a larger drill, so that the beam will swing on a narrow edge within the hole.
Paper clips
Now take a paper clip and straighten out the wire so you have a wire with a hook on each end. If you put this through the middle hole the beam will hang from it. You can then hang the other end over anything you wish - a nail hammered into a shelf in the garage, or a cup-hook in the kitchen. I clamp mine in my fly-vice. The beam should hang perfectly level. Mine didn't, it was slightly down one end, so trying for perfection I filed that end – a little at a time – until it hung straight and level. It took me one minute to get it true, using my Swiss Army Knife. This does not need a fully equipped workshop. You now have your Balance Beam.
Next you need an accurate and variable known weight against which you can balance your fly-lines and shooting heads on the scales. A collection of small identical items of a known weight is best. You can go fancy if you like and buy a set of gram scale-weights, but that is just showing off. After trying various household items, like wall-plugs and wood-screws, I followed the original author's lead and went to the local stockist of “machine fastenings”, that's nuts, bolts and screws to most of us.
Nuts and bolts
Its been a while since I was last there, and I found that they now sold “chandlery” too, bits for boats and sailing. Great, that meant there would be plenty of stainless steel stuff. What I was after were machine nuts which were a consistent size and a convenient weight. The smaller sizes are sold partly by weight, and with the helpful assistant bearing with my silly request and explanation (“It's for weighing WHAT?”) we found that M6 (that's 6mm) stainless steel machine nuts weigh so near to 2 grams each that it makes no difference. To be exact, it worked out to 49 nuts per 100 grams, according to the electronic scales in the stockist's shop. Be careful here. Don't mix unalike items or you will get confusing results. Stainless steel is quite a bit more dense (heavier) than non-stainless. Be consistent in what you use as your weights. You can easily see different sizes of nut, but it's not so easy to spot a few non-stainless items amongst stainless steel.
I double checked my “weights” by asking the local Postmistress to weigh them on her super-accurate scales, and it turned out that they were actually 47 nuts per 100 grams. That's 2.128 grams per nut, or two and one eighth grams each. That's close enough to be suitable for my use. The main thing is to have units that are all the same weight, and a known weight.
Weighing in
If you look at Martin Joegensen's article on making shooting heads, you will see that Martin has a chart that suggests a starting point weight for shooting heads. For an AFTM 5 rod, it could weigh 10+ grams, for #6 rods - 12+ grams, #7 rods – 14+, #8 – 16+ grams, #9 – 18+, and #10 – 20+ grams. I am sure you can see the correlation between my collection of approximately 2 gram stainless steel hardware and the weight of heads for rods from #5 - #10. I will probably go back to the stockist, and see if I can be lucky enough to find machine-nuts weighing one gram each, or even half a gram. But this balance beam is accurate enough that using any small known weight, I could weigh up little bags of – perhaps – plastic wall-plugs that will give me the one-gram weight I would need to balance up a shooting head weighing 11 grams (suggested weight by Scierra for many of their #5 rods), or some other odd-number of grams.
The only thing you need to remember when using the balance-beam is that what you do to one side, you should do to the other. So I use the same weight of paper-clips on both ends, I use the same weight of poly bag to hold the line I am weighing as I do to hold the machine nuts. This is really over-fussy, but it works.
Know your lines
Do you have a collection of old lines, and odd lengths of line that are the remains of shooting-head experiments from the past, and you can't be sure what AFTM weight they are? Well, now you can find out. Weigh the first 30 feet and you will know. Keep the rest of the line supported and level with the coil while you are weighing, so that it doesn't influence the weight of the 30 foot coil. Again Martin's table gives the weights for standard AFTM lines from AFTM 3 to 10. Weigh the off-cuts from your old experiments and see what they tally. Perhaps you could do some really crazy trials with very short and heavy shooting heads for some special situation.
I had a shooting head I had made several years ago by cut-and-try methods for my #7/8 weight rod. I cut it from what was claimed to be a DT9F. With the beam I found that the head weighed 15 grams and it is 27 feet long. That's about right for a #7Shooting Head according to Martin's list. It's not just the measuring tape that can tell you interesting things about your rod or your casting.
An easy measure
If you measure a lot of lines, it might be an useful to find a straight piece of kerb or wall (outside, unless your wife is very understanding) and mark it in some way to the lengths you use most often. I used white cellulose car-paint to mark a kerb on the drive-way in five-foot increments up to 30 feet, and I divided up one of the end-sections into separate feet. That way I can quickly measure a fly-line. I use it for building radio aerials, too, but that's another story.
Morse-Code line marking
One last thing I got from that American magazine article. When you have found out the weights of your lines and shooting heads, you can mark them up on the end of the line with a spirit-based marker-pen. The suggestion given was one short mark for one AFTM increment two short marks for two increments, and one long mark for three increments. So an AFTM five would be marked with one long and two short marks (5=3+2), an AFTM 6 with two long marks (6=3+3), and so on. That way, you can read the weight of all your lines just by looking at one end. Useful, I think; especially if you carry a mix of spare shooting heads bagged up in your pockets.
- Log in to post comments


YOU guys are doeing
YOU guys are doeing a great job @gff thanks for all the info keep it up and THANKS again dvh
Simple and sweet. th
Simple and sweet. thank you!